

language
Product



News
Our company offers a comprehensive set of products in the industrial, commercial and
residential fields.
Essential Installation Tips for Ground Mount Solar Racking
Release time:
2026-08-04
Essential Installation Tips for Ground Mount Solar Racking
Table of Contents
- 1. Introduction to Ground Mount Solar Racking
- 2. Understanding Solar Racking Systems
- 3. Choosing the Right Location for Your Installation
- 4. Pre-Installation Checks Before Setting Up
- 5. Step-by-Step Installation Process
- 6. Essential Tools and Materials for Installation
- 7. Maintenance Tips for Long-lasting Performance
- 8. Common Installation Mistakes to Avoid
- 9. Conclusion
- 10. FAQs
1. Introduction to Ground Mount Solar Racking
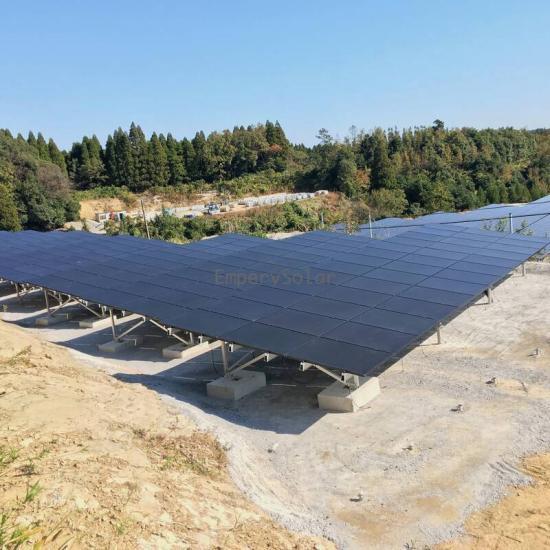
Ground mount solar racking serves as a critical component in the installation of solar panel systems. Unlike roof-mounted systems, ground mount installations provide flexibility in placement and orientation, allowing for optimal sun exposure. In this guide, we will explore essential installation tips that ensure your ground mount solar racking is secure, efficient, and long-lasting.
2. Understanding Solar Racking Systems
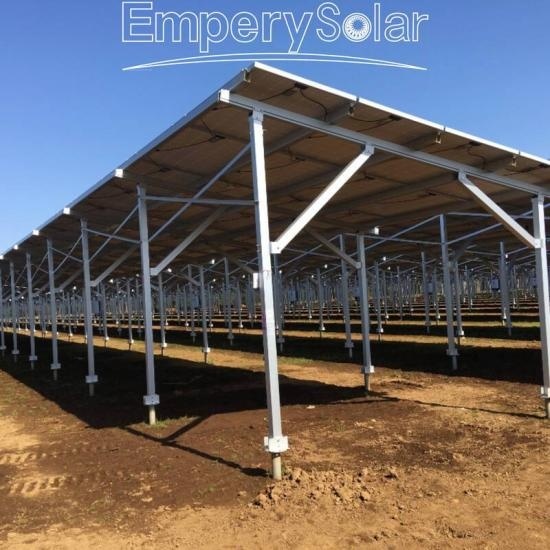
Solar racking systems serve as the backbone for solar panel installations. They secure solar panels to the ground and help maintain the correct angle for maximum sunlight exposure.
2.1 Types of Racking Systems
There are primarily two types of solar racking systems for ground-mounted installations:
- **Fixed Racking Systems**: These provide a stable structure that does not move or adjust once installed. They are cost-effective and simple to install.
- **Tracking Racking Systems**: These systems are designed to follow the sun’s path across the sky, maximizing energy capture throughout the day. Although more expensive, they can significantly increase energy production.
2.2 Benefits of Proper Racking
Using the right racking system ensures:
- **Stability**: Secure attachment that withstands environmental stress.
- **Efficiency**: Optimal panel positioning for capturing sunlight.
- **Longevity**: Reduced risk of damage to solar panels.
3. Choosing the Right Location for Your Installation
The location of your ground mount solar racking is crucial for maximizing efficiency and ensuring long-term performance.
3.1 Assessing Sunlight Exposure
Select a location that receives ample sunlight throughout the day. Avoid areas with shade from trees, buildings, or other obstructions.
3.2 Evaluating Soil Conditions
Ensure that the ground is stable and suitable for anchoring. Sandy or loose soils may require additional support or alternative anchoring methods.
3.3 Considering Local Regulations
Familiarize yourself with local zoning laws and permitting requirements regarding solar installations. Compliance ensures a smoother installation process.
4. Pre-Installation Checks Before Setting Up
Before diving into the installation process, conduct a thorough assessment.
4.1 Site Survey
Perform a site survey to confirm the chosen location meets all criteria for the solar racking system.
4.2 Utility Marking
Contact local utility companies to mark underground lines and avoid potential hazards during installation.
4.3 Weather Considerations
Check the weather forecast to choose a dry day for installation, preventing muddy or unstable working conditions.
5. Step-by-Step Installation Process
Following a structured installation process is essential for success.
5.1 Gather Your Team
Assemble a team of experienced workers to ensure safety and efficiency during the installation.
5.2 Lay Out the Design
Mark the dimensions of the solar racking system on the ground. A clear layout will streamline the installation process.
5.3 Install Ground Mount Posts
Drive the posts into the ground using a post driver or excavator, ensuring they are level and spaced correctly according to your design.
5.3.1 Securing the Posts
Use concrete or gravel to secure the posts in place, depending on local soil conditions and regulations.
5.4 Attach the Racks
Once the posts are secure, attach the horizontal racks according to the manufacturer’s instructions.
5.5 Mount the Solar Panels
Carefully mount the solar panels onto the racking system, ensuring they are aligned and secured properly.
6. Essential Tools and Materials for Installation
Having the right tools and materials on hand will make your installation smoother.
6.1 Required Tools
- **Post Driver**: For driving posts into the ground.
- **Level**: To ensure all components are aligned.
- **Wrenches and Sockets**: For tightening bolts.
- **Drill**: For creating holes as needed.
6.2 Necessary Materials
- **Ground Mount Posts**: Typically made from steel or aluminum.
- **Racking System**: Specific to the type of solar panels being installed.
- **Anchors and Bolts**: For securing the racking system.
7. Maintenance Tips for Long-lasting Performance
Regular maintenance ensures the longevity of your ground mount solar racking system.
7.1 Routine Inspections
Conduct inspections at least twice a year to check for wear and tear, corrosion, or loosening of fittings.
7.2 Cleaning Solar Panels
Keep solar panels clean and free from debris to maximize efficiency.
7.3 Monitor Performance
Utilize performance monitoring tools to ensure your solar system is generating the expected energy.
8. Common Installation Mistakes to Avoid
Being aware of common pitfalls can save you time and money.
8.1 Ignoring Local Regulations
Not adhering to local regulations can lead to fines and required rework.
8.2 Inadequate Soil Preparation
Failing to properly assess soil conditions can result in unstable installations.
8.3 Poor Alignment of Panels
Improperly aligned panels can lead to decreased efficiency and increased wear on the system.
9. Conclusion
Installing ground mount solar racking systems requires careful planning and execution. By following the tips outlined above, you can ensure a successful installation that maximizes the efficiency and longevity of your solar energy system. Remember to choose the right location, gather the appropriate tools, and conduct regular maintenance checks to keep your solar panels performing at their best.
10. FAQs
What is the best angle for ground-mounted solar panels?
The ideal angle for solar panels typically ranges between 30 to 45 degrees, depending on your geographic location and seasonal sun path.
How deep should ground mount posts be?
Ground mount posts should be buried at least 2 to 3 feet deep, depending on local soil conditions and frost lines.
Can I install a ground-mounted solar system myself?
While DIY installations are possible, it is recommended to enlist professionals to ensure compliance with safety and legal standards.
How often should I clean my solar panels?
It is advisable to clean solar panels at least twice a year, or more frequently if you live in a dusty area.
What are the cost factors for ground mount solar installations?
Cost factors include the type of racking system, the size of the installation, labor costs, and any necessary permits or inspections.
This comprehensive guide equips you with the knowledge needed for a successful ground mount solar racking installation. By paying attention to each detail, you can maximize your solar energy investment and contribute to a more sustainable future.
RELATED BLOG

EmperySolar at the 18th Solar PV & Energy Storage World Expo in Guangzhou
The Grandeur · 18th Solar PV & Energy Storage World Expo is currently in progress. Visit Empery Solar at Hall 10.2, Booth B592 in Guangzhou.
View Details


Xiamen Empery Solar Technology Co.,Ltd.

Room 611, Quanyutong Business center, No.368, Xianhou She, Huli Districts. Xiamen,China.


Whatsapp : +86-13950145677


